What you need:
A large square of fabric that won't fray at the edges
Fabric scissors
Cotton thread in colours that blend with your fabric
Wadding or stuffing
A button
Some bias binding (edging for sewing neat edges on fabric)
A small piece of ribbon
Step one:
Cut out 2 pieces of fabric that are twice as long as your tablet/ kindle and leave an edge of about half a centimetre for the seams.
I did this really roughly by laying my tablet on the fabric then folding it over to create double the length. Then I laid this bit of fabric over another bit and cut around it to make two.
You also need to cut out two pieces of wadding (padding) that are slightly smaller than each half of your rectangle. You should end up with the pieces below:
Step two:
Place one fabric rectangle on top of the other, wrong sides facing each other. Fold in half and pin down the longest sides.
Step 3:
Turn it all inside out so you have a lined "pocket".
Step 4:
Fill the inner two "pockets" with your pieces of wadding.
Step 5:
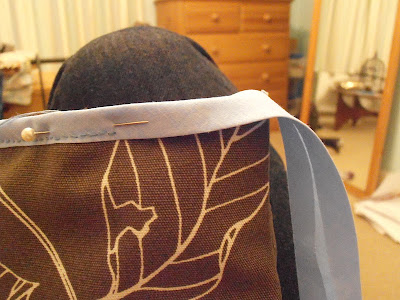
Now you will have a rough seam around the top so it's a good idea to sew on some bias binding. I got mine from Hobby Craft and it comes in all different colours and widths. It is basically like strong ribbon which has be ironed in half so that you can fold it over and edge and sew it on. Pin it in place a little bit at a time and sew VERY NEATLY around it! This is the bit to spend your time on.
Step 6:
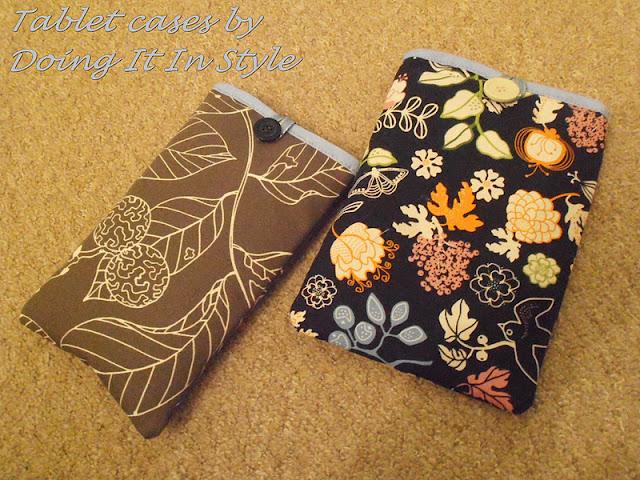
Finally, sew a button on the front (being careful to hide your stitches by only going through one layer of fabric.) Add a button hole by folding a piece of ribbon in half and stitching inside.
Put your tablet or kindle in it's new home and enjoy!!
You could also adapt this tutorial to make a case for your glasses or make it smaller for your mobile phone. If you are super clever, you could add a zip to the top!
Enjoy!


No comments:
Post a Comment